Friday, April 27, 2012

Friday's Favorite Flea Market Find!

Hello and welcome to......Friday's Favorite Flea Market Find!  :) 

 I thought it would be fun to feature a favorite find each week!


I love old silver trays!  I found this little beauty at the Kane County Flea Market.  I like the handles on it and it has cool little feet on the bottom. It is a really heavy solid tray! It was of those things I just knew I had to have when I saw it!


I love it as a coffee table tray.  This is a great way to display smaller items together without them looking lost on their own.  I love old books & candles so that is what went on my silver tray! 

Thank you for checking out this week's Favorite Flea Market Find!  :) 


Wednesday, April 25, 2012

Corn Crop Feeder Machine Gear Mirror~

Corn crop feeder machine gear mirror anyone????? 

 While I was at the flea market in Elkhorn, WI I saw these little mirrors that I loved!  They were rusty,old, and pretty cool!  I asked about the price and the vendor said $18.00 each.  Now, at flea markets my sister Kim and I have names for vendors when we are there.  Not mean names, just names to help us remember who had what in case we want to go back.  Examples are.... the naked guy, (even though he wears clothes now) white lady, (everything she has is painted white), the sisters, (they were so much fun, they related to us sisters so well)  Anyways the list goes on and as you can see it is not very original, but it works.  Well the seller of the little mirrors has been dubbed the expensive lady.  She would not budge on any of her prices and she was priced high.  I loved all her things but she would not move!  I thought $18.00 for the mirror was high especially since I wanted several.  She said she made them by hand and they took some time to make.  I talked myself out of the mirrors.

A few weekends later I was at the Kane County Flea Market and I saw a pile of rusty gears laying on the ground. I asked the vendor about them and she said they were old corn crop feeder machine gears.  She had piles of them.  They were the EXACT thing expensive lady made her mirrors out of!  Price for these gears?  $2.00 each!  I bought a bunch!  :)


 This was a very simple project.  I bought the mirrors at Hobby Lobby.  They came in a package of two and were $2.00 with a coupon!


I did experiment with glue, the best glue for this is called E-6000.  It is really strong glue and it dries clear.  I squeezed a thin line of glue around the edge of the gear and placed the mirror on top. I let it sit awhile to be sure it bonded.


I glued a pop can top to the back of the mirror so I could hang it.


I like it as a candle holder too!


So if I would have bought the mirrors from the expensive lady I would have spent $108.00 for six.  I made six of them and spent a total of $18.00 for all!  I think I like my deal better!  :) 


Friday, April 20, 2012

My first furniture refinishing project!!


This is one project I have been putting off.  I have never refinished furniture before, just painted it.  I have to give you a little background into this cabinet first.  I had been looking for something to put our TV on.  I wanted a dresser or a buffet of some sort.  And of course once I started looking I could not find a thing.  I went to WI to hang out with my family for the day and went into a large antique store near my sister's house.  The place is HUGE.  I was on a mission to find the right piece.  We had my kids and my sister's little kids so it was not a stress free search!  When everyone had almost run out of patience we saw this dresser.  It was in the very back corner of the store with stuff stack on top of it and all around it.  I looked at the tag and it said $60.00!!  We thought we were reading it wrong so we asked and it indeed was $60.00!  Now was the fun part.  The store only moves out furniture on certain days of the week.  And of course it was not on the day we were there.  We were heading back to IL that day so I wanted it then!  If we could move it ourselves I could take it that day.  Where there is a will there is a way is my motto!!!!  My daughter watched all the little ones and my son, sister, and I started digging out the dresser.  Once we did that we had to get it through some very tight isles to get it out.  It was alittle nuts to say the least.  BUT we did it and even hoisted it into my car.  Since the dresser was so packed in there I did not notice its many imperfections.  I was ok with that though for the price!


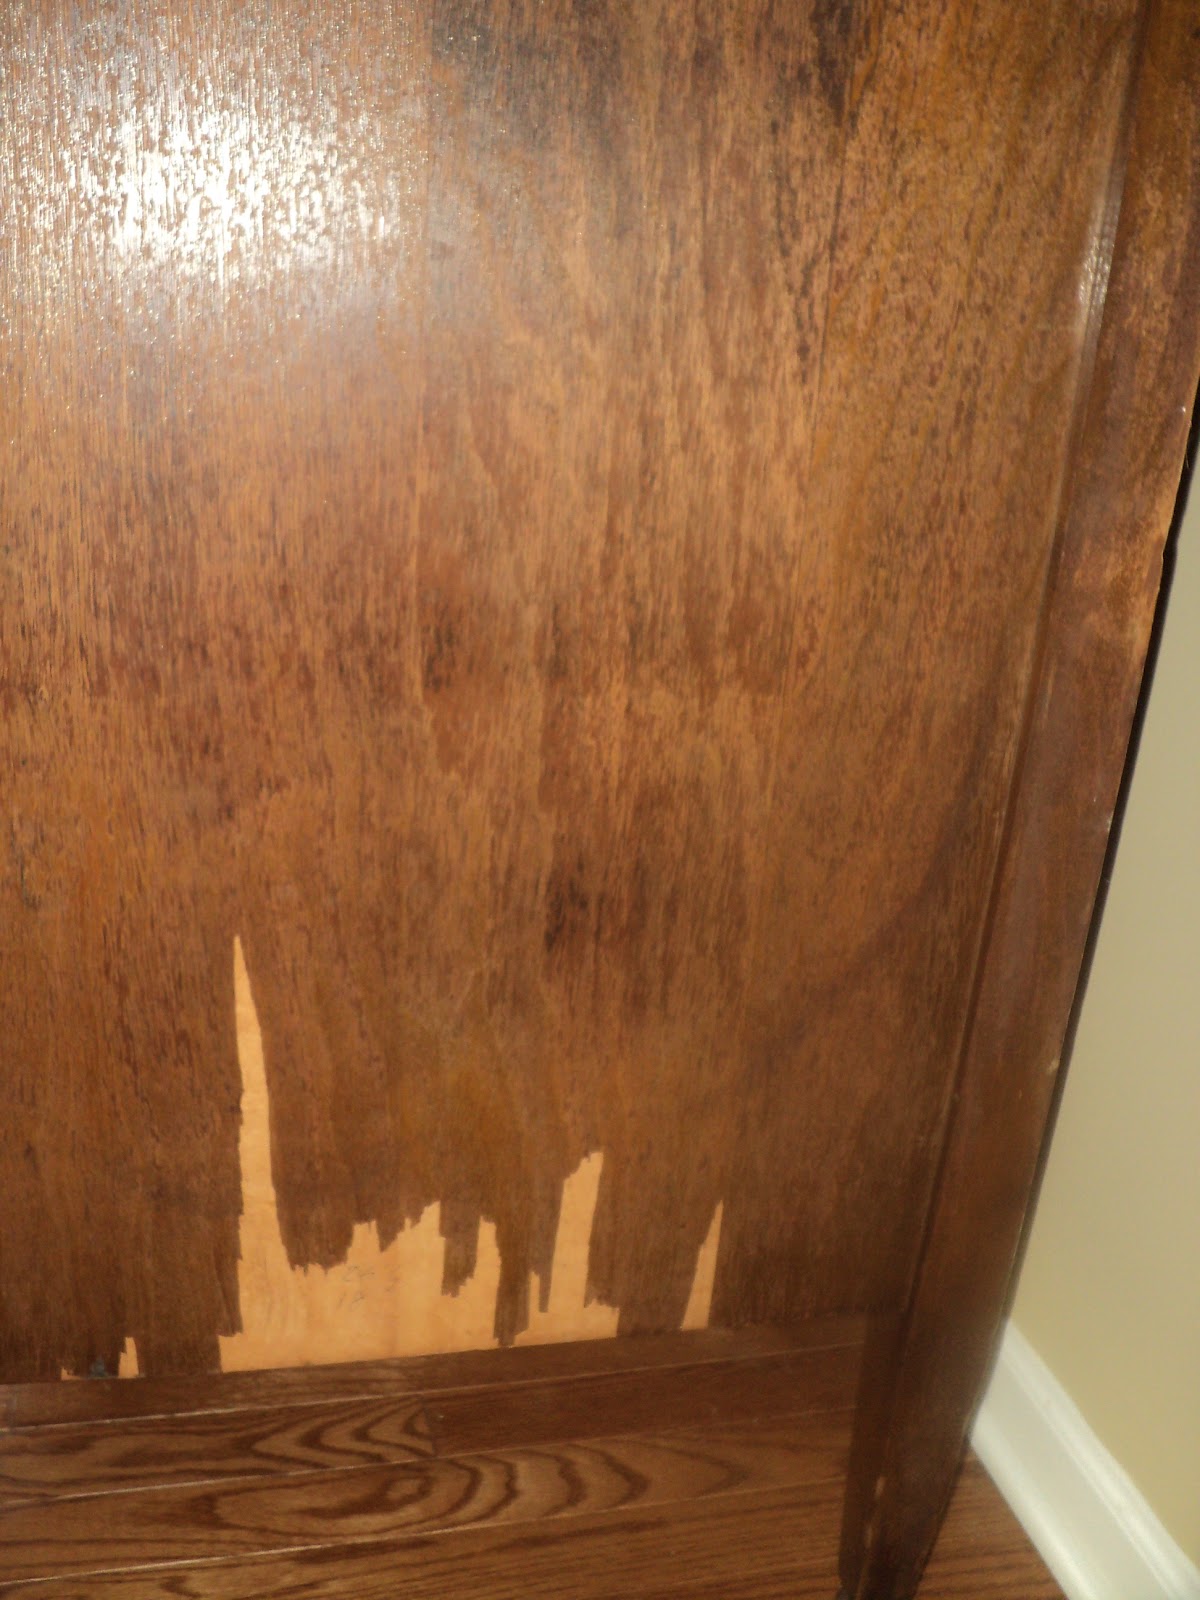
Both sides looked like this. 


The top was a mess.  It had the thickest coat of polyurethane on it I had ever seen.  And it was not in good shape.  I borrowed my friends orbital sander and started going to town.  My mistake was I started it in the house since I could not move it outside myself.  Not a very neat project!


You can see here all the small chips and weird bubble areas.


When my husband got home he helped me get it out to the garage.  There I sanded forever and finally got it down to bare wood!


Once it was sanded and wiped clean I started staining it.  I used Minwax Red Oak.  I loved how it was turning out!  I then put a few THIN coats of poly on the top.


Since the sides were so bad I decided to go with new wood.  I went to Home Depot and they cut me two pieces of oak that were the perfect thickness to fit right in.


I stained both them with the same Minwax Red Oak.


Here is how it turned out. 


I then gave Old English Scratch Cover a try and it was awesome.  I used it on the areas I did not refinish.  It filled in all the little chips and scratches and really made it shine! 


I was having an issue on where to put the cable box and DVD player.  My husband came up with the idea to make the top 3 drawers into flip openings so we could put all the wired stuff in there.  GENIUS!


This is by far one the my favorite projects.  While it was not much fun to do, I am soooooo pleased with how it turned out!  I think it is a pretty cool piece of furniture for $60.00 and alittle love!  :)

Sunday, April 15, 2012

Before and After Bathroom!


On Friday I had posted our "after" master bathroom.   Now it is time to see the "before".......


These pics are actually phase 2.  I had really dark window treatments up and all chocolate brown towels and rugs.  I gradually added some yellow & white in hopes to make it a more cheerful room.  The valances did not turn out too well, I had them made from a window panel.  They did not stay up there too long.  You can also see the dark cabinet hardware, or can you?  I have no idea why we picked out hardware that totally blended with the wood!  I have since sold almost all the old knobs on craigslist.  They would look great on some light wood cabinets!

And we lived with those light fixtures for over six years.  It is what the builder put in for us.  It was always in the back of my mind to swap them out but just never got around to it.  That is until I found my $7.00 lights!


Those curtains just never looked right!


The paint color Baguette by Sherwin Williams is a nice warm brown.  But I was very glad to change it up to Rainwashed.  I am in love with that color right now!


Sometimes it is just the little things.  The white washed basket (that you can only see half of) has had those flowers and greenery in it for years.  I never paid much attention to it.  When I took it out and put a few white flowers from Pier 1 in the basket, it made such a difference. 


I was totally comfortable in my before bathroom.  But the new paint and accessories made me love it!!! It is exactly what I had envisioned for that room.  It feels more"spa like" and just all a brighter place to be! :)


Friday, April 13, 2012

Loving Blue in our master bathroom!


 Our master bathroom had been brown for years.  I loved it that way.  That is until I started loving BLUE more. I had so much fun redecorating this room.  Just a few small changes brightened it so much!


The walls went from Sherwin Williams Baguette (which is very pretty but in a small space, very brown) to Sherwin Williams Rainwashed.   (I will post "before" pics soon)  I love this color!  I used it first in my laundry room and had to use it again somewhere. 


            The paint was a big change in here.  After the paint was the fun part, the painting not so much! I added some simple white curtains on the windows.  I will show later how I made these.  I changed out the cabinet hardware from brown knobs that blended right in with the cabinet color to silver knobs.  I love the difference it made!  **makes me wonder how I had those brown knobs on there for so long!!


I switched out the brown rugs and towels for white and blue.  I have started a small collection of things for when my kids are on their own.  One more year and my son will be going to college. ):  He will have a great supply of chocolate brown towels!!  

The cute little stool near the tub is from an antique store. 


I found these light fixtures at Lowe's.  We used to have a Lowe's  near our home so I would go in often.  They always had some great clearance sales.  I got these light fixtures for $7.00 each, down from $100.00 each!!  Crazy!! That Lowe's is no longer there, I sure miss it!


I used the same towels that I have in my powder room.  Once I find something I like I want it everywhere.......


The blue flower pictures above each towel bar are another really low cost project.  I printed the flowers from digitalgallery.nypl.org digitalgallery.nypl.org  This idea I got from the Thrifty Decor Chick.  I have used it several times.  It is a great way to switch out prints.  I printed these flowers out on plain white paper, matted them in gray, and put them in silver frames.  Total cost for two is under $8.00. 

  
This room was one of my favorite projects. I feel like it is spring in that room now instead of winter and I love that feeling!!!


Tuesday, April 10, 2012

My sister's flea market finds!


  While we were celebrating Easter in Wisconsin, I managed to get a few pictures of my sister's house.  I wanted to share some of her really cool projects! 


This is the table I mentioned in my last post.  The metal frame is an antique wash tub.  She bought the empty tub and had a vision for a table. 


She had bought a few pieces of barn wood at another flea market.  She was not sure what she was going to do with it at the time.  She ended up using that for the wash tub table. She cut a piece of the wood in half and fit it into the wash tub.  Usually she has pretty stuff on the table, but we were in such a hurry taking the pictures we forgot to show how it looks all pretty!


Now this industrial table is MY FAVORITE!  I also love how she got the table.  It was a really hot day at the flea market and the man who was selling it was practically naked!  We were a little creeped out by this.  BUT the naked man sold her the industrial cart for $8.00 so we were OK with him! Again she had a vision for this table. I love the light wood with the metal!

****don't mind the little shoes on the floor.  Kim has little kids so we were just kicking stuff out of our way!  :)****


I also love the little orange metal stool! 


 This next idea I am stealing!  I think it is so cute.  She took an antique frame and added twigs from her yard.  She used a staple gun to attach the twigs to the back of the frame.  I think it looks great with her wall color!


Here is just a cute little table she painted blue!


   This chair was brown with a rattan seat.  She spray painted it white and used some really pretty fabric.  Love it!


This is just a quick snapshot my sister's flea market finds.  When she unloads her car it looks like a huge pile of junk (which I guess it kind of is....) but the end product is so neat!  I love that it is all original and sooooo creative!


Thursday, April 5, 2012

Randolph Street Market, Chicago, IL


Another one of my favorite flea markets is the Randolph Street Market in Chicago.  My sister and I checked it out last summer.  We loved it!  It is not as large as some other flea markets, but it has some really COOL stuff!  We left that flea market with a car packed of really original things. (my sister bought an antique wash tub and made it into a coffee table, I will post pics of that soon!)


Here is my daughter, her friend, and my niece.  This flea market is fun for younger kids too because it has vintage jewelry and purses etc.  There are also great places to eat when you are done shopping!


This little chair is just one of the many things I found that day.  I love the wood carvings on the back of it.  I knew the minute I saw it I was buying it, and I was painting it yellow! 

  ***As you can see by the turquoise paint on the bricks behind the chair this is one of my spray painting spots!  I am a messy painter!


The yellow I decided to use was Rust-Oleum Satin Strawflower. 


This chair was very easy to spray paint. It took 2 quick coats.  I wanted the wood to show through so I sanded it quite a bit once it was dry.  


Here is a close up of the fabric.  I got it at Hobby Lobby for $3.00. I unscrewed the chair seat and removed the old fabric.  I did leave the padding, it was in good condition. I used my staple gun and stapled the new fabric on, reattached the seat, and it was done!


This project cost me about $22.00. (the chair was $18.00)  I will always look at my little yellow chair and remember our fun adventure that day!  And if I ever get tired of the yellow paint and the fabric it is a very easy fix!  BUT for now I am loving it!  :)